|
On May 14, 2014, I gave a presentation on home theater design
from the point of view of a neurotic mathematician. At the end of the talk I joked that I was on step 19 of 27. After which I was asked
if I'd make my list public, to help others.
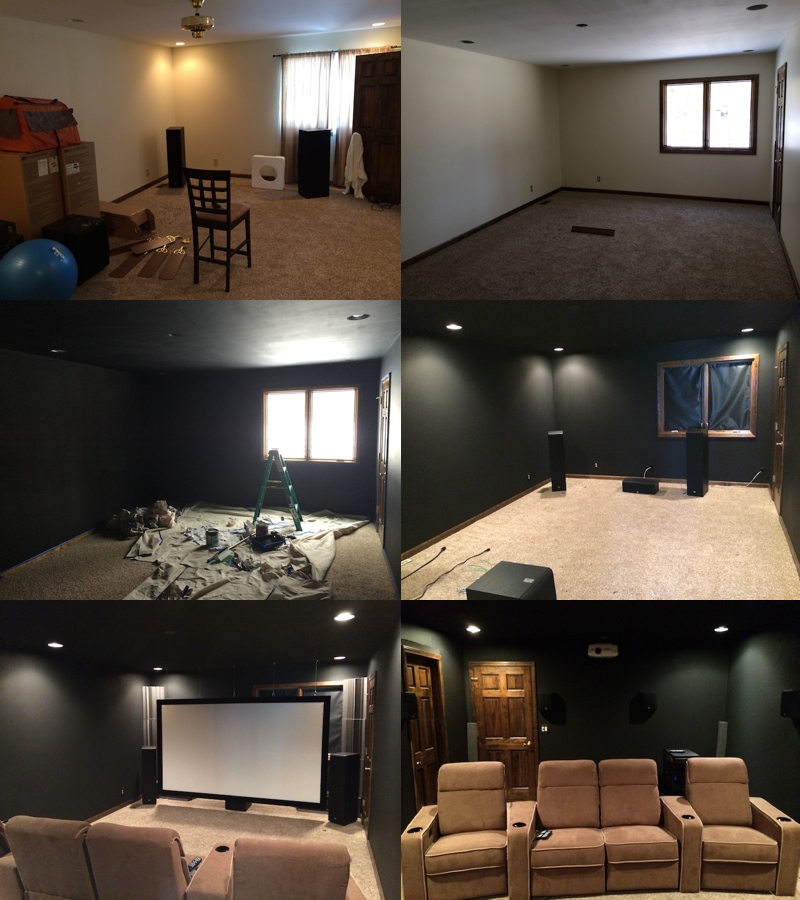
Below is a my version of how to construct a home theater. I've removed many of my steps,
which were subtle details and sub-steps that matter only to me. The description I give is for a 100% conversion to a
dedicated home theater with 7.2 surround sound and a front projecting system.
Some steps will be different if LCD or Plasma is used instead of projection.
Expect more than 100 man hours of physical labor in addition to at least that many hours of researching what you want and how you want to do it.
Dollars can be substituted for man hours, but you won't be happy with the exchange rate.
|
-
If you are the DIY type, begin by building your own speaker cables, AV equipment shelves, projector mount, screen masks, screen, and acoustic treatments.
Constructing your own cables and treatments can save a lot of money.
-
Buy the AV gear (receiver/amplifier, media player, networked player, speakers, projector, screen, cabling). Do not underestimate the cost of AV cables, speaker wire, subwoofer cables, and romex.
-
Choose placement for fronts, center, surrounds, and subs, as well as locations for the projection screen, projector, av components, and power conditioning.
If you want the center behind the screen, buy an acoustically transparent screen. If you want a good audio/video experience, follow THX specs.
-
Route in-wall speaker wires, in-wall HDMI, and pass through electrical outlets for the projector. You're going to become well acquainted with your crawlspace or attic.
-
Install gang boxes for cable routing and wall mounted surround speakers. In wall cable routing often requires special tools and cutting into walls.
Only let your spouse see the finished product, and not all of the holes you punch in the walls.
-
Prime and paint with flat dark colors (even the ceiling), and add a dark rug or carpeting. If you want false walls, a drop ceiling,
floor lighting strips, LED ceiling stars, or blacked-out windows, do that now.
-
Install lighting fixtures, upgrade power outlets, and add a dedicated electrical circuit.
-
Buy a power conditioner/surge protector for the AV gear. This should have a UPS for the projector,
or you can buy a separate UPS for it. Power loss to the projector while it's running = buy a new $500 bulb or possibly a whole new projector.
-
Ceiling mount the projector, install AV components, power management, and projection screen.
-
Add furniture, rugs, carpets, sconces, etc. Reclining theater seats with cup holders are fun.
While you handle the heavy lifting and nerdy AV stuff, a family member might like to choose the decor.
-
Place front and center speakers, wall mount the surrounds, and test and study locations for subs.
-
Add acoustic treatments (bass traps, broad band absorbers, acoustic panels, acoustic foam, diffusers, etc.)
A common myth is that you can treat a room with blankets and egg crates. These will mellow out high frequencies but do nothing for the lows.
-
Add screen masking panels or an electronic masking system to switch from 4:3, to 16:9, to 2.35:1 and other aspect ratios. A sharp black edge makes a difference.
-
Install automatic control systems or programable universal remotes which sync to online databases of devices.
-
Calibrate video and audio or pay for a professional calibration.
-
Add trinkets (framed movie posters, popcorn machine, movie-themed toys and props, mini-bar, etc.).
|
Notes:
-
Choosing speakers, AV equipment, a projector, a screen, and cabling requires many hours of background reading or a lot of money and experimenting.
-
Dark paint, carpets, and screen masks add a lot to the experience.
You're trying to duplicate, or improve upon, the commercial theater experience.
-
Acoustic treatments are essential. Do not overlook these. It is said that the most important piece of audio equipment is the room itself.
-
Professional AV calibration by certified technicians is expensive ($1000+).
Buy a good calibration disk and an amp with built in audio tests and calibration utilities.
Get a Radioshack SPL meter, a good microphone, and some open source acoustic waterfall plot software if you really want to geek out.
-
Placing subs is part art and part science. Read everything you can find on the topic and run experiments.
|